카카오톡 클론코딩(8) - swagger 달기
오늘은 스웨거를 달면서 생겼던 이슈와 스웨거가 뭔지 알아보자
Swagger는 RESTful API를 문서화 하고 테스트할 수 있도록 도와주는 API 문서화 도구다.
Spring Boot 환경에서 API를 만들 때, 자동으로 API 문서를 생성하고, UI를 제공해 쉽게 테스트도 해볼 수 있다.
우선 Swagger를 사용하기 위해서는 의존성을 추가해줘야 한다.
implementation 'org.springdoc:springdoc-openapi-starter-webmvc-api:2.7.0'
implementation 'org.springdoc:springdoc-openapi-starter-webmvc-ui:2.7.0'
스프링 버전 3.0 이상에서는 2.7.0 버전을 써야 호환이 잘되는데 난 그걸 몰랐어서 고생을 좀 했었다..
또한 api 의존성만 추가하면 되는줄 알았는데 api 의존성만 추가하면 UI가 로드가 되지 않아서 분명 컨트롤러에 있는 api 들은 인식이 되는데 웹페이지로 불러와 지지 않아서 꽤나 고생을 했었다. 이 글을 보는 사람들은 이런 이슈를 겪지 않기를 바란다.
또한 JWT를 사용하는 중이라면 추가적인 설정이 필요하다
@Configuration
public class SwaggerConfig {
    @Bean
    public OpenAPI openAPI() {
        String jwtScheme = "JWT";

        return new OpenAPI()
                .info(apiInfo())
                .addSecurityItem(new SecurityRequirement().addList(jwtScheme))
                .components(new Components().addSecuritySchemes(jwtScheme, securityScheme()));
    }

    private Info apiInfo() {
        return new Info()
                .title("KokoaTalk API 문서")
                .description("KokoaTalk 서버 API 문서입니다.")
                .version("1.0.0");
    }

    private SecurityScheme securityScheme() {
        return new SecurityScheme()
                .name("JWT")
                .type(SecurityScheme.Type.HTTP)
                .scheme("bearer")
                .bearerFormat("JWT");
    }
}
apiInfo()로 섹션에 표시될 API 기본 정보를 설정하면 된다.
- title : 문서제목
- description : 설명
- version : API 버전
securityScheme() 을 통해 JWT에 관한 설정을 하면된다.
- name("JWT") : JWT 인증을 위한 스키마 이름 설정
- type(SecurityScheme.Type.HTTP) : HTTP 기반 인증 사용
- scheme("bearer") : Bearer 토큰 방식 사용
- bearerFormat("JWT") : JWT 형식 사용
그 후 application.yml 파일을 설정하면 된다.
springdoc:
  api-docs:
    path: /api-docs
    enabled: true
  swagger-ui:
    path: /swagger-ui/index.html
    operations-sorter: default
API 문서의 엔드포인트를 /api-docs로 설정하고
swagger UI의 접근 경로를 /swagger-ui/index.html로 설정
예를 들어 https://yourdomain.com/swagger-ui/index.html 이런식으로 접근하면 된다.
operation-sorter는 엔드포인트의 정렬 방식을 설정하는 옵션인데
- default : 경로를 정의된 순서대로 정렬
- method : HTTP 메소드 순서대로 정렬 (GET, POST, PUT, DELETE)
- alpha : 경로를 알파벳 순서로 정렬
이 밖에도 tag 기준, paths 기준으로도 정렬 가능하다.
이제 swagger를 쓸 준비는 끝났다. 물론 Spring Security를 사용중이라면 swagger의 경로를 허용해줘야 한다.
허용해주지 않는다면 당연하게도 403 Forbidden 오류를 볼 수 있을것이다.
다음으로는 컨트롤러에서 API를 문서화 해주면 된다.
@RestController
@RequiredArgsConstructor
@RequestMapping("/api/member")
@Tag(name = "Member", description = "회원 관련 API")
public class MemberRestController {
private final MemberService memberService;
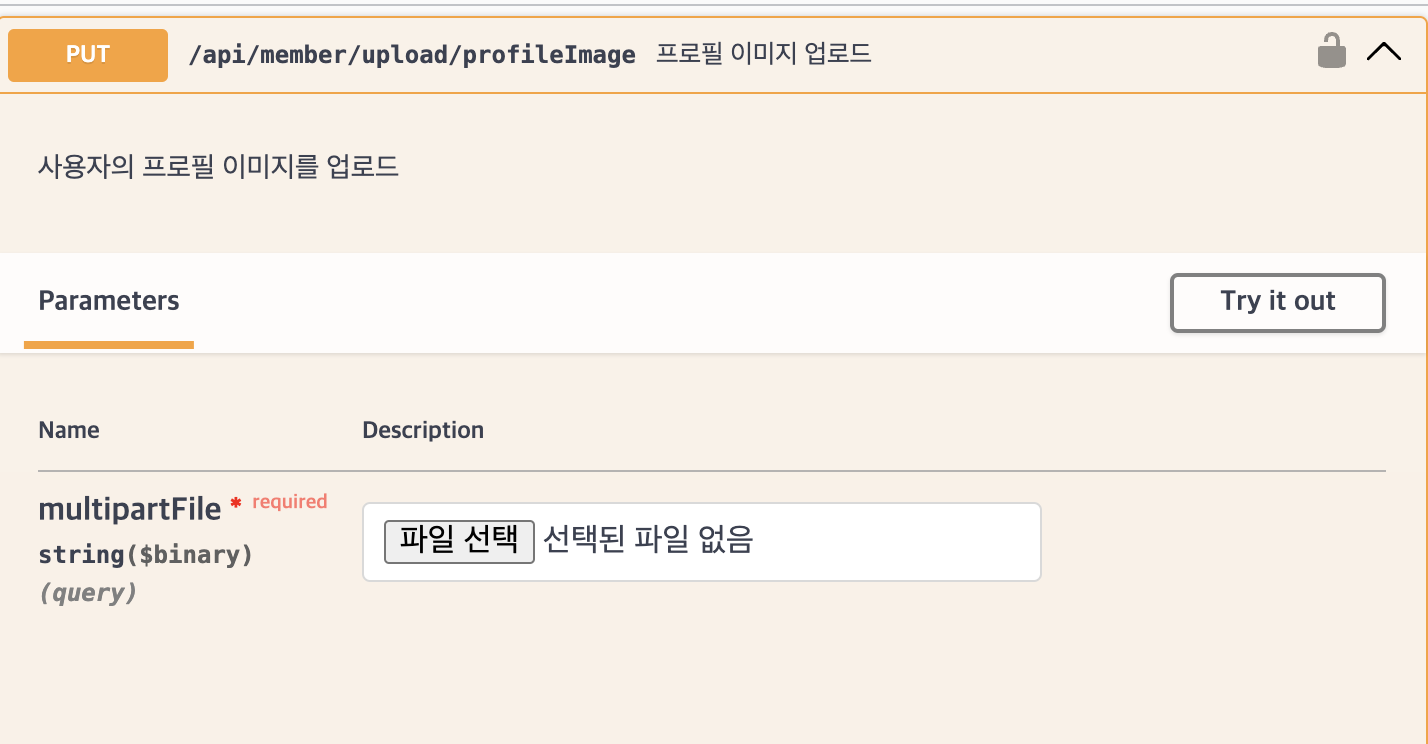
@Operation(summary = "프로필 이미지 업로드", description = "사용자의 프로필 이미지를 업로드")
@ApiResponses({
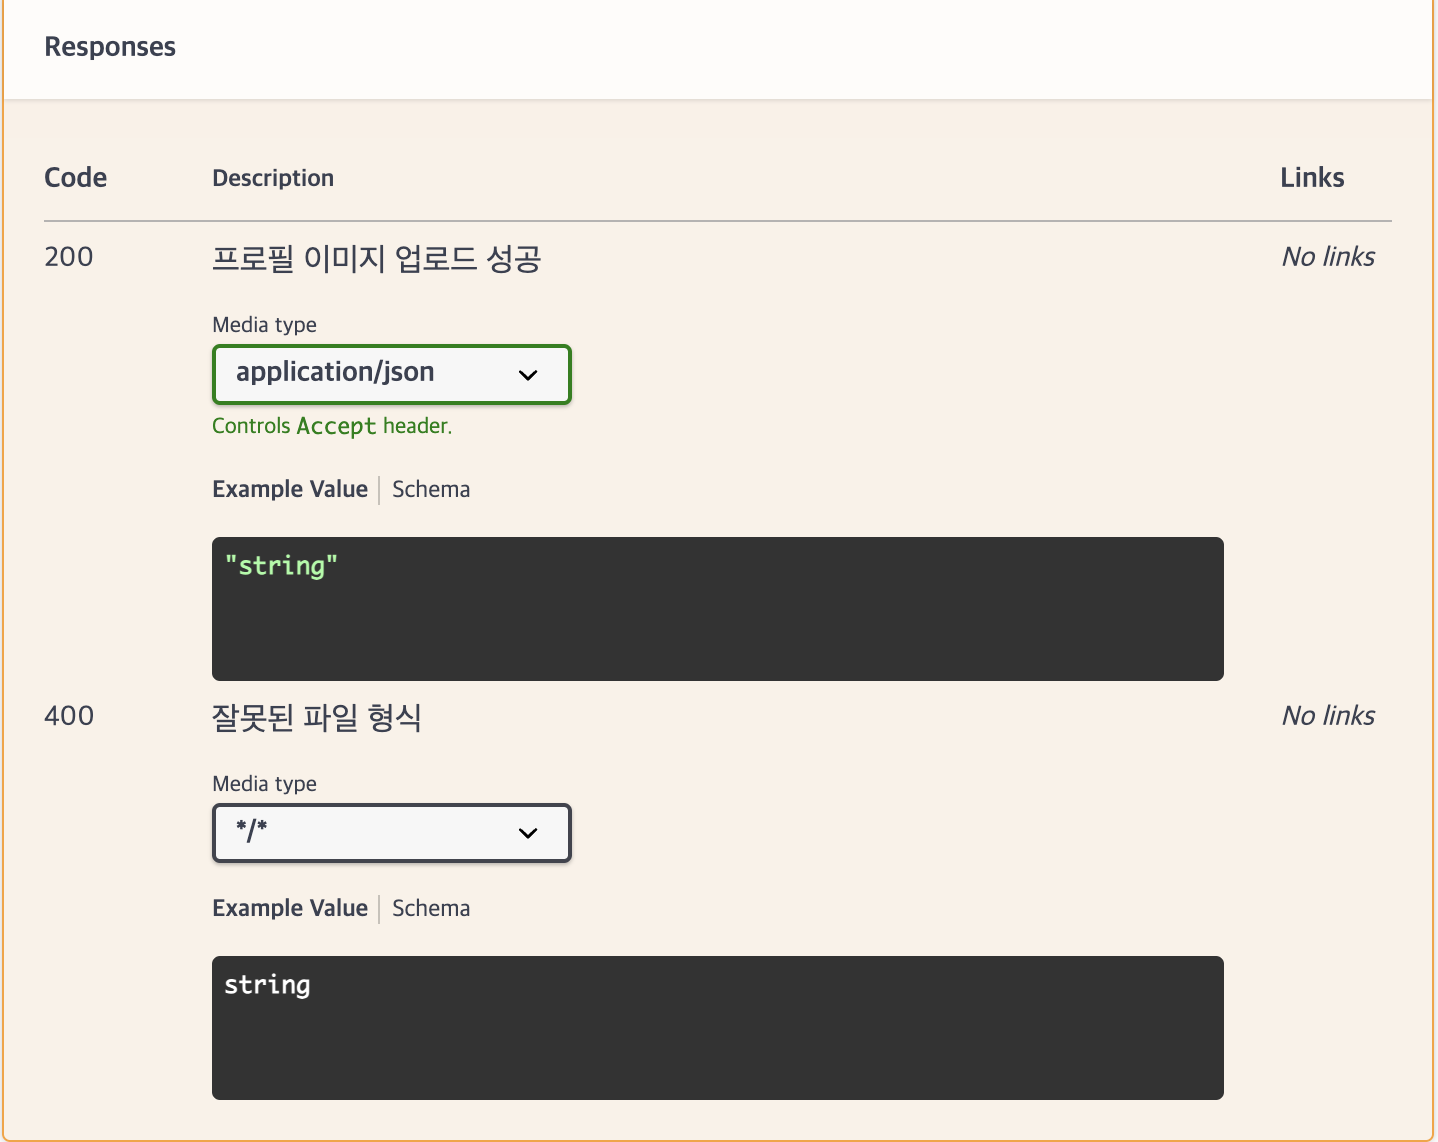
@ApiResponse(responseCode = "200", description = "프로필 이미지 업로드 성공", content = @Content(mediaType = "application/json", schema = @Schema(implementation = String.class))),
@ApiResponse(responseCode = "400", description = "잘못된 파일 형식"),
})
@PutMapping("/upload/profileImage")
public ResponseEntity<String> uploadProfileImage(MultipartFile multipartFile, @AuthenticationPrincipal CustomUserDetails customUserDetails) {
memberService.uploadProfileImage(multipartFile, customUserDetails.getUserId());
return ResponseEntity.ok("프로필 이미지 수정 완료");
}
@Operation(summary = "배경 이미지 업로드", description = "사용자의 배경 이미지를 업로드")
@ApiResponses({
@ApiResponse(responseCode = "200", description = "프로필 이미지 업로드 성공", content = @Content(mediaType = "application/json", schema = @Schema(implementation = String.class))),
@ApiResponse(responseCode = "400", description = "잘못된 파일 형식")
})
@PutMapping("/upload/backgroundImage")
public ResponseEntity<String> uploadBackgroundImage(MultipartFile multipartFile, @AuthenticationPrincipal CustomUserDetails customUserDetails) {
memberService.uploadBackgroundImage(multipartFile, customUserDetails.getUserId());
return ResponseEntity.ok("배경 이미지 수정 완료");
}
@Operation(summary = "프로필 이미지 삭제", description = "사용자의 프로필 이미지를 삭제")
@ApiResponses({
@ApiResponse(responseCode = "200", description = "프로필 이미지 삭제 성공", content = @Content(mediaType = "application/json", schema = @Schema(implementation = String.class))),
@ApiResponse(responseCode = "400", description = "기본 프로필 이미지는 삭제 불가")
})
@PutMapping("/delete/profileImage")
public ResponseEntity<String> deleteProfileImage(@AuthenticationPrincipal CustomUserDetails customUserDetails) {
memberService.deleteProfileImage(customUserDetails.getUserId());
return ResponseEntity.ok("프로필 이미지 삭제 완료");
}
@Operation(summary = "배경 이미지 삭제", description = "사용자의 배경 이미지를 삭제")
@ApiResponses({
@ApiResponse(responseCode = "200", description = "배경 이미지 삭제 성공", content = @Content(mediaType = "application/json", schema = @Schema(implementation = String.class))),
@ApiResponse(responseCode = "400", description = "기본 배경 이미지는 삭제 불가")
})
@PutMapping("/delete/backgroundImage")
public ResponseEntity<String> deleteBackgroundImage(@AuthenticationPrincipal CustomUserDetails customUserDetails) {
memberService.deleteBackgroundImage(customUserDetails.getUserId());
return ResponseEntity.ok("배경 이미지 삭제 완료");
}
@Operation(summary = "자기소개 수정", description = "사용자의 자기소개를 수정")
@ApiResponse(responseCode = "200", description = "자기소개 수정 성공", content = @Content(mediaType = "application/json", schema = @Schema(implementation = String.class)))
@PutMapping("/update/bio")
public ResponseEntity<String> updateBio(@AuthenticationPrincipal CustomUserDetails customUserDetails, @RequestBody BioUpdateDto bioUpdateDto) {
memberService.updateBio(bioUpdateDto.getBio(), customUserDetails.getUserId());
return ResponseEntity.ok("자기소개 수정 완료");
}
}
- @Tag(name, description) : API의 카테고리를 설정하고 그에 대한 설명을 하는 어노테이션이다.
- @Operation(summary, description) : API의 엔드포인트에 대한 설명을 하는 어노테이션이다.
- @ApiResponses : 여러개의 응답이 필요할때 사용하는 어노테이션이다.
- @ApiResponse(responseCode, description) : 개별 응답 코드 설명을 하는 어노테이션이다.
- @Content(mediaType, schema) : 응답의 데이터 형식과 모델을 지정하는 어노테이션이다. json 형식으로 응답을 받기 때문에 "application/json"을 사용했다.
- @Schema(implementation = Class.class) : 응답에 사용될 DTO 클래스를 지정해준다.
이렇게 어노테이션으로 문서화를 진행해주면 아래의 사진처럼 ui가 나타난다.

여기까지 Swagger가 뭔지 어떻게 사용하는지 적어봤다. 여기서 겪었던 이슈들을 다시 정리해보자면 크게 3가지다.
1. Spring Boot 버전과의 springdoc-openapi의 호환
이 문제는 구글링을 열심히 해서 해결했다. 스프링 3.0 버전 이상에서는 최신버전에 가까운 swagger-api 를 사용해보자
2. Spring Security에 엔드포인트 허용
이 부분은 까먹고 추가를 안하긴 했다만 추가하고도 403에러가 계속 터져서 꽤나 고생했던 이슈다 이 문제는 아래의 문제와 연결된다.
3. ui의존성 로드 문제
이 문제는 GPT를 사용하면서 해결했는데 다른 글들을 찾아볼때 ui 의존성을 추가하는걸 못봤던거 같았는데 물론 내가 놓쳤을 수 도 있다. 아무튼 분명히 ui가 없는 /api-docs 경로로는 컨트롤러에서 분명히 API들이 인식되고 에러도 없었는데 /swagger-ui/index.html 이 경로로 들어가서 swagger ui를 이용할라 하니 403 에러가 뜨는것이었다. 그래서 cors 문제인지 필터에 어딘가에서 걸러지는지 로그를 보면서 추적을 해봤는데 아무리 봐도 해결될 기미가 보이지 않았다. 근데 단순히 ui의존성을 추가하니 바로 해결되었다. 근데 나는 여기서 이상함을 느끼긴했다. 분명 리소스가 없는거면 404 에러가 떠야하지 않나? 그래서 찾아본 결과 Spring Security는 정적 리소스 여부를 확인하기 전에 보안 필터를 적용한다는 것이 원인이었다. 경로는 허용해놨지만 /swagger-ui/index.html을 찾지 못해 해당 요청을 차단한 것이라고 한다. 그니까 쉽게 말하면 이 요청을 허용해야 할지 판단할 리소스 자체가 없기 때문에 그냥 보안규칙에 의해서 먼저 차단 당해 403을 반환한 것이라고 한다.
다음 부터는 꼭 꼭 꼭 ui 의존성도 함께 추가해야겠다.